
Turn terrain into a usable environment with measured placement, protected routes and a complete asset package. Use the same process for a planted landscape or a neatly arranged mesh library.
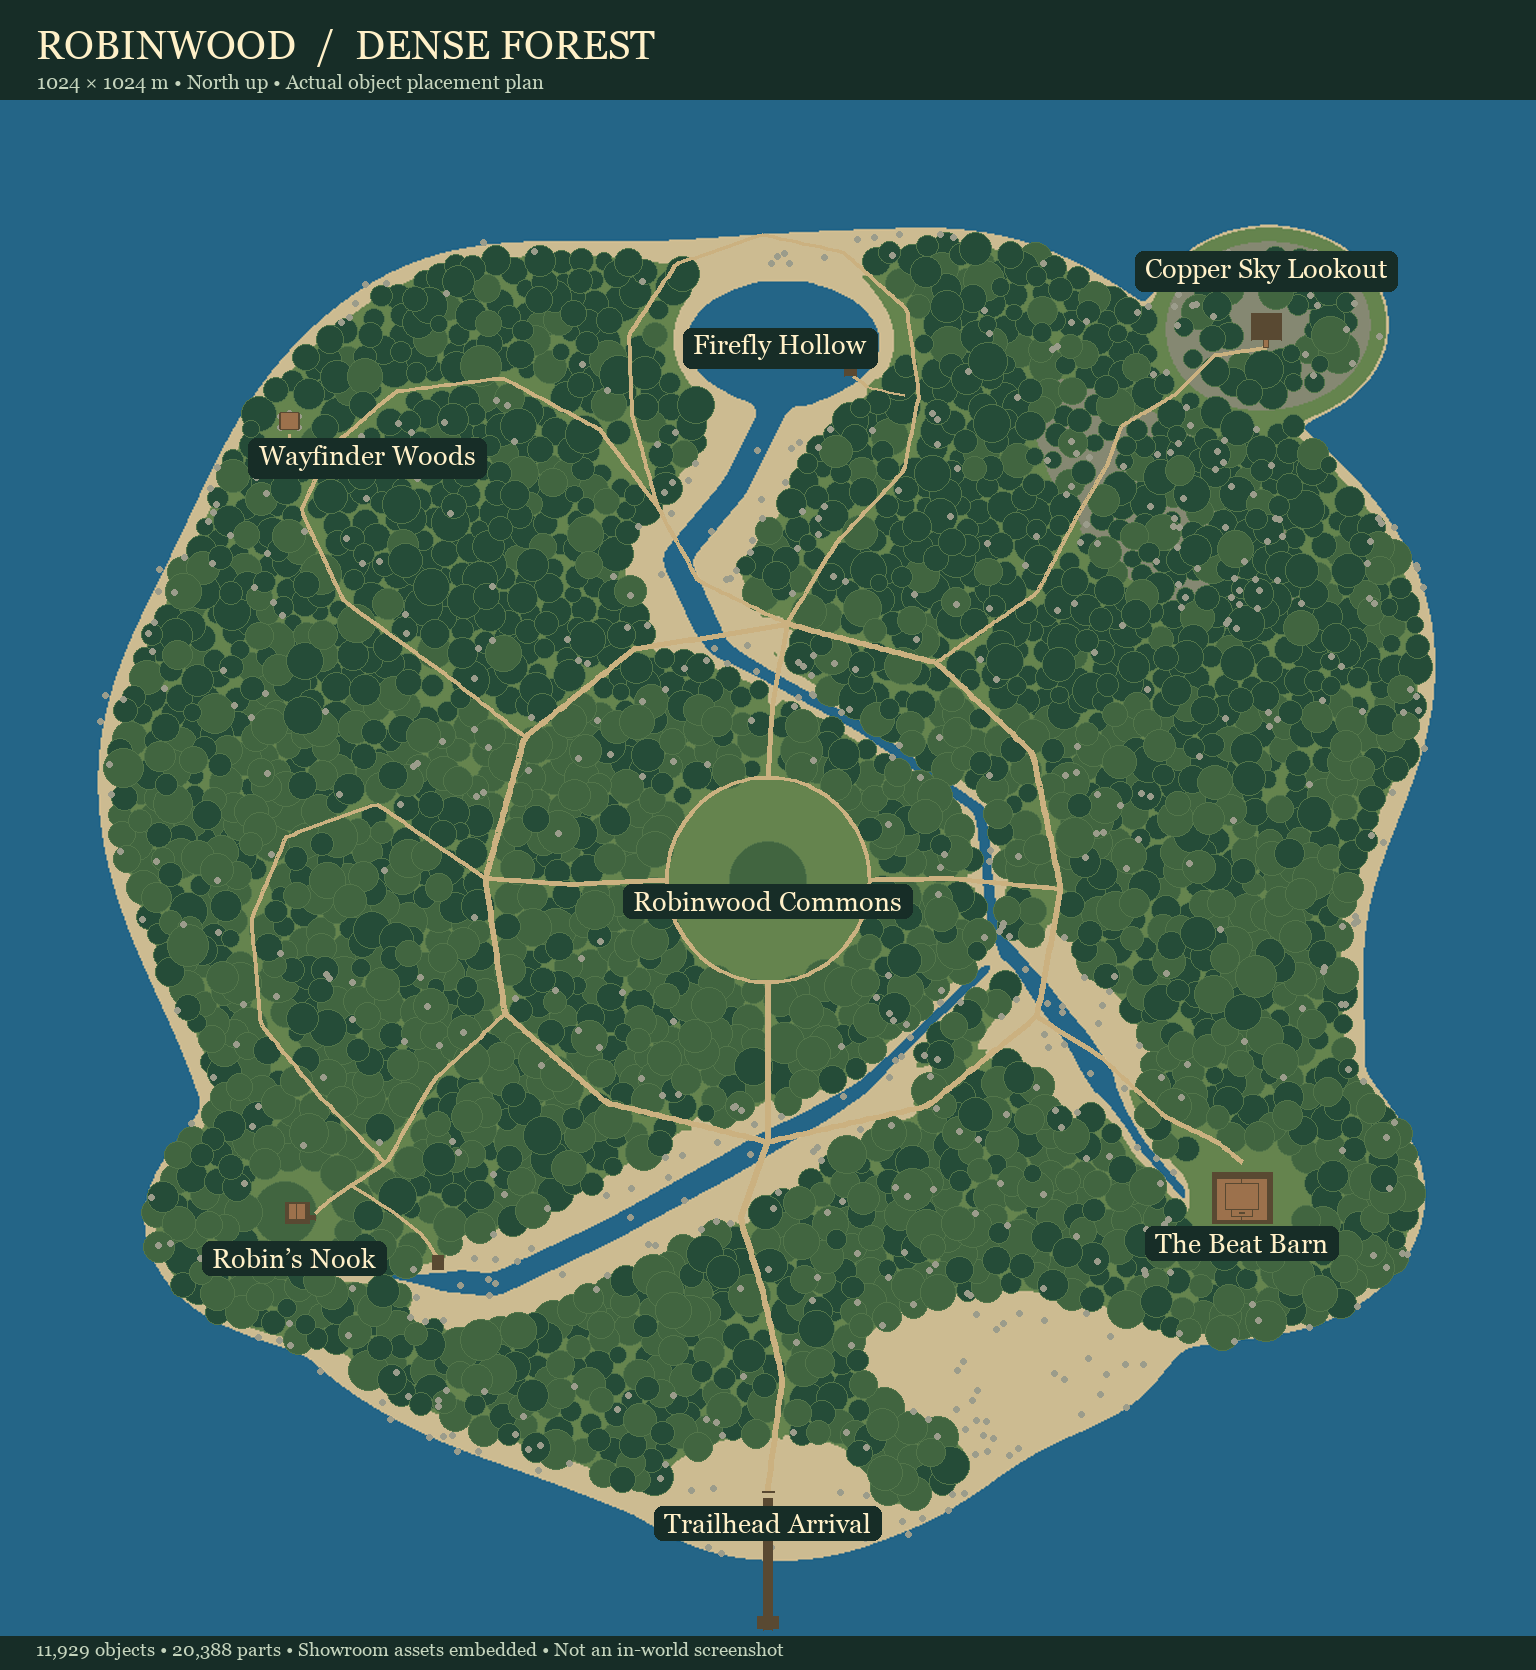
What you will make
An asset catalog, placement manifest, exclusion map, read-back previews and an OAR containing the intended objects and dependencies. Use $opensim-terrain-object-placement. Guide 1 supplies the terrain master; Guide 3 supplies new mesh assets.
Choose the scope first
A full region package can contain terrain, settings and parcels. An object-only addition contains the selected objects and assets. For a library, arrange parts close enough to browse while keeping them disconnected and clear of one another.
Page 2Catalog assets and protect the design
Set up the session
Use Codex with GPT-6 Astra selected in the model control available to your account. Open a local project folder so the agent can inspect inputs, run tools and save results. These guides use a local Python and Blender workflow; a chat response alone does not execute an export. OpenAI identifies the API model as gpt-6-astra [1]. To install the companion skills, ask Codex to review the extracted Skills folder and install its three skill folders in your user skill directory, preserving any newer local versions. Open a new chat and ask it to confirm the named skill is available [2].
Inspect before placing
Supply the final terrain and its axis metadata, the asset folders, the destination size and the intended area. Have Codex inspect object bounds, original transforms, contact points and texture dependencies. The asset origin may be far above or beside its ground contact.
Protect existing work
Mark buildings, doors, paths, water, parcel constraints and objects that must stay untouched. When replacing generated content, identify the exact prior generated set using its manifest or IDs. Appearance and object names alone do not prove which additions are safe to remove.
Prompt to copy
Use $opensim-terrain-object-placement. Read the final heightfield and asset catalog. Add a woodland layout with open paths and clear building entrances. Preserve everything outside the marked new-work area. Make a reproducible placement manifest and north-up preview first. Package only the approved new objects and their assets in an OAR; exclude terrain, region settings and parcels.
| Record | Why it matters |
|---|---|
| Asset key and source | Find the exact mesh and its dependencies |
| Bounds and contact point | Place the base at the surface |
| Rotation and scale | Reproduce the complete transform |
| Collision and scripts | Separate scenery from interactive parts |
| License and creator | Preserve permitted reuse and metadata |
Page 3Place objects on the actual ground
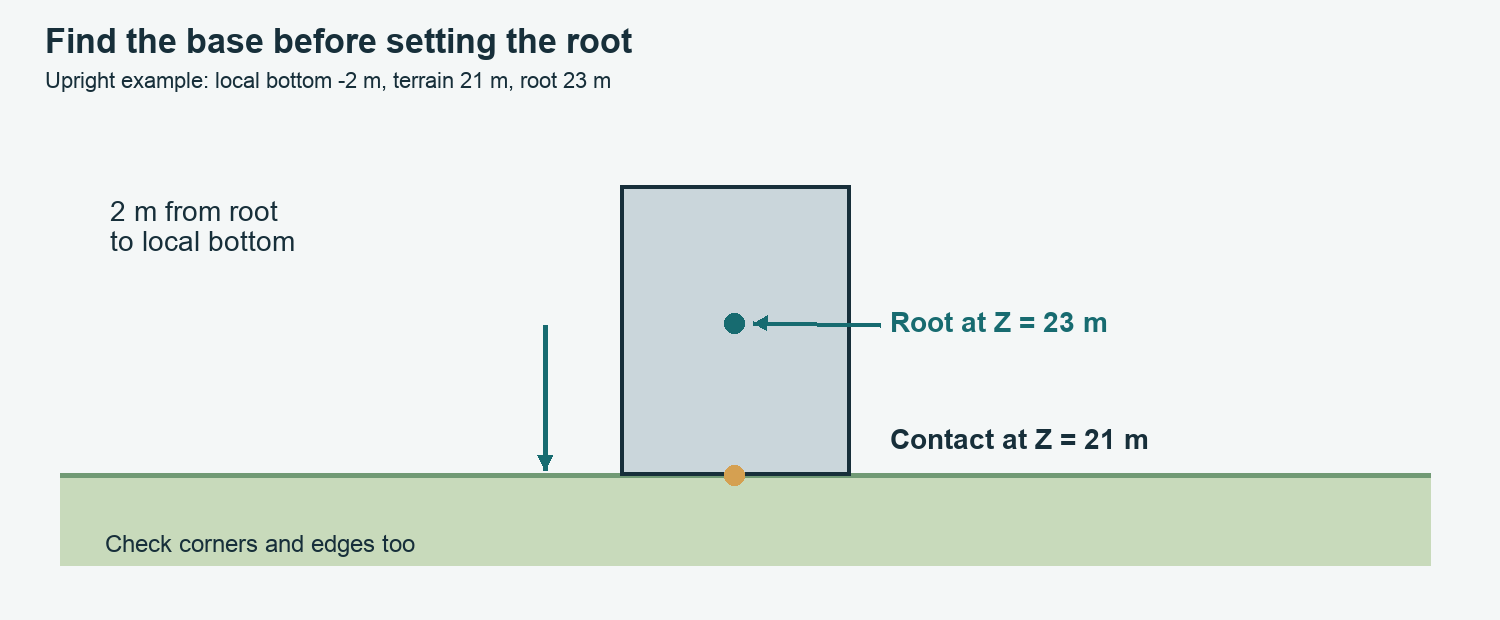
Sample the correct surface
Use the final terrain heightfield and bilinear sampling between grid points. Reject locations beyond the region or valid sampling area; silently clamping coordinates can pile objects onto a border. If a deck or mesh is the support surface, terrain height alone is insufficient.
Account for the pivot
For local contact point c, scale S, rotation R and intended world contact g, root translation is t = g − RSc. For an upright object with a bottom at local Z = −2 m, unit scale and ground at 21 m, put its root at Z = 23 m.
Check more than one point
Large building footprints need corner and edge samples. Keep houses and tree trunks upright; use grading or supports where necessary. Groundcover can follow a limited slope. Applying the terrain normal to a whole house usually creates a tilted floor.
Prompt to copy
Show the root position, transformed contact point and ground height for three sample objects. Check all footprint corners. Flag floating bases, buried entrances and out-of-region extents before placing the full set.
Page 4Keep routes clear and libraries organized
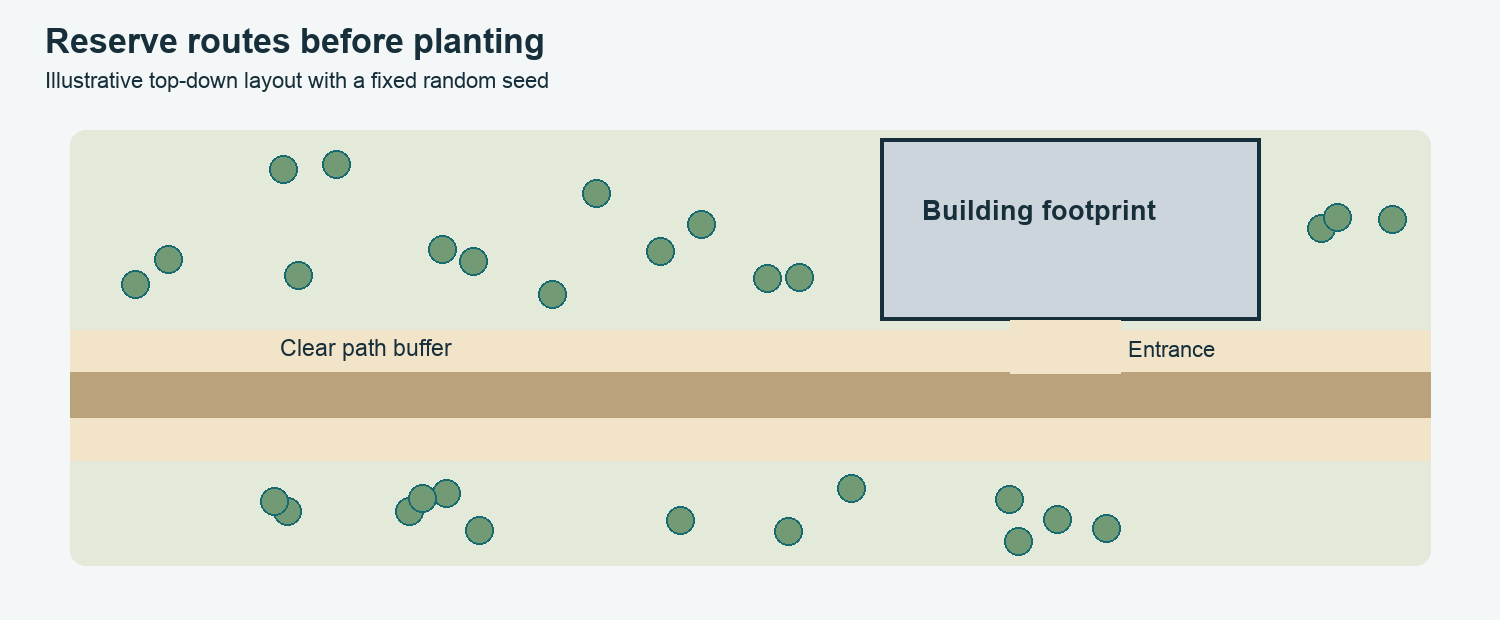
Plant with repeatable rules
Set a random seed, density, minimum spacing, allowed elevation and slope. Exclude roads, entrances, water and protected footprints. Vary approved species, scale and yaw within sensible ranges. Record rejected candidates and final counts so a revision can be compared.
Connect travel meshes deliberately
Use each part’s authored connector position and direction. Align the selected new connector to the existing one. If the free end follows terrain, preserve the join and check the entire deck clearance. A rigid piece may need a ramp variant or support; moving one endpoint cannot arbitrarily reshape it.
Use bounds for library rows
Place each object using its rotated width and depth plus a gap. Check the complete footprint against region limits. A single fixed center spacing makes large curves or tall bridges collide. Store the staging origin, row assignments and bounds in the manifest.
Prompt to copy
Arrange the kit in rows near the specified staging point, disconnected with a 2 m gap between complete footprints. Show row extents and names. Stop and report any piece that cannot fit inside the staging area.
Page 5Package objects and contents boxes
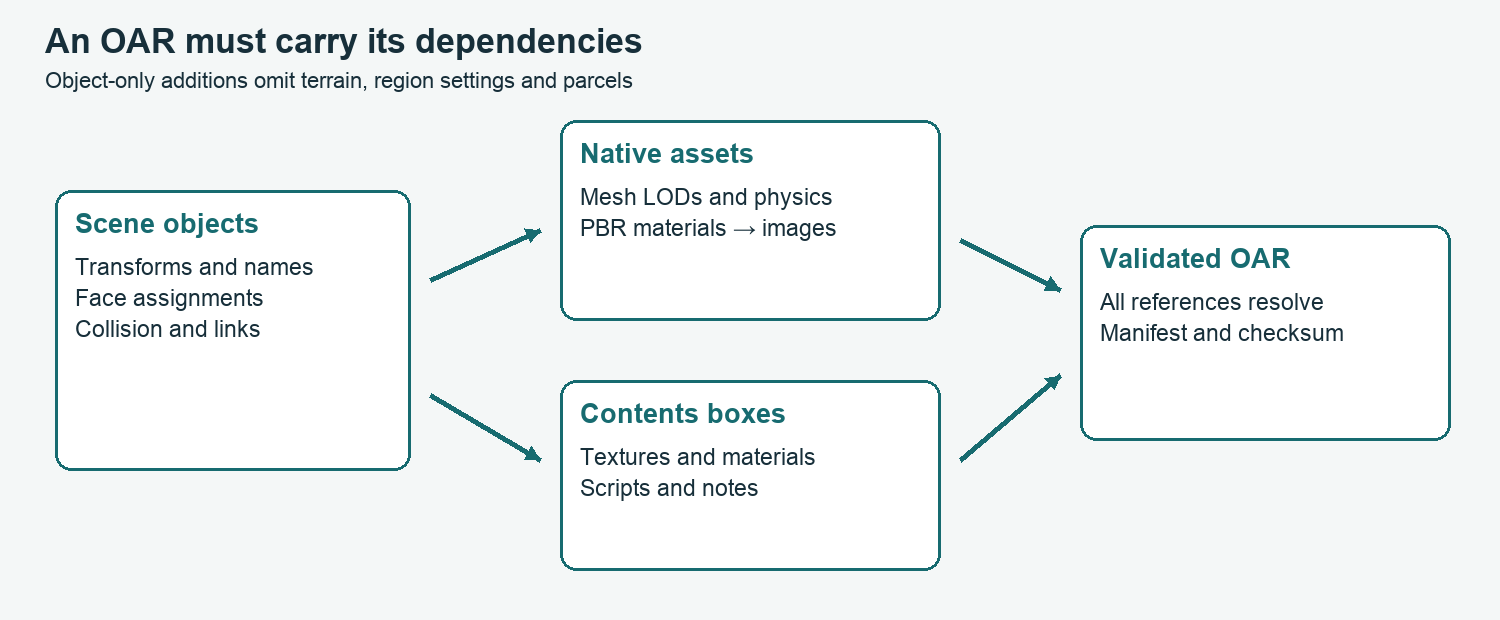
Use the working OAR pipeline
Our project writes serialized scene objects and native assets into an archive, then reopens it. Collada is an upload interchange file; renaming a DAE to a native mesh asset does not convert it. Preserve material bindings, part transforms and creator/permission metadata.
Prepare useful boxes
Give each building or asset family its own named box. Include reusable textures, PBR materials, AO maps, LSL scripts and a contents list. Use names such as Barnhouse_Wall_BaseColor and Barnhouse_Wall_PBR. Split a very large library into smaller logical boxes if inventory retrieval is slow.
Check assignment as well as presence
Having a PBR asset in the archive does not mean it is applied to the right face. Verify face-to-material assignments, material-to-image references and the box task-inventory records. Compile scripts where the target engine is available and test door bindings after import.
Prompt to copy
Reopen the final OAR and check all object, mesh, PBR, texture and inventory references. Report missing assets, duplicate IDs, out-of-region bounds and unintended terrain/settings/parcel entries. Render the decoded export, not just the source scene.
Page 6Merge and inspect the result
Test the smallest useful batch
Confirm region dimensions and current simulator merge options. Start with a few representative objects, a contents box and an interactive door. Back up the destination. The following is a simulator-console example; substitute the real test region and server path. OAR merge behavior is documented by OpenSimulator [3].
change region Object Test
save oar Object-Test-before.oar
load oar --merge /server/path/objects-only.oar
Understand repeated loads
Merge does not identify replacements by matching names or positions. Rebuilt objects with new IDs can duplicate an earlier set; behavior for existing IDs depends on the simulator and options. Use the recorded prior manifest for an explicitly authorized replacement.
Walk and interact
Check bases, path continuity, slopes, stair access, doorway clearance and performance. Confirm PBR under neutral lighting and inspect fallback textures. Open every contents box and retrieve representative assets. Test door open, close and reset behavior after the linkset is fully available.
Resolve failures narrowly
Floating objects: recheck local base offset and terrain version. Blocked routes: inspect collision shapes and exclusion buffers. Missing materials: follow the full material-to-image reference chain. Hanging box inventory: inspect inventory types, permissions and server logs, then retest a small box. Do not repeatedly merge the whole set.
Keep an audit trail
Deliver the placement manifest, sources, archive checksum, validation results and exact live-test status. A full asset catalog is useful, but does not prove every placement was visually inspected.
Sources and project examples
[1] OpenAI model reference: https://developers.openai.com/api/docs/models/gpt-6-astra
[2] OpenAI Build skills: https://learn.chatgpt.com/docs/build-skills
[3] OpenSimulator archive documentation: https://opensimulator.dev/wiki/OpenSim_Archives
Project evidence: tools/build_robinwood_populated.py; output/robinwood-full-v4/placements.json; output/robinwood-houses-repair-v3/Source/package_oar.py. Original full-region builders are examples, not safe defaults for additive jobs.